by Levi Opsatnic.
Whenever it comes to fishing spring creeks, especially around State College, it is nearly impossible to beat a fly that resembles the millions of Scuds and Sowbugs that inhabit these streams. Often times, anglers fish patterns like the Hare’s Ear or Walt’s Worm in order to replicate these crustaceans; however, I have found a pattern that, in my experience, out fishes both of those patterns by ten fold. I simply refer to this pattern as a “sowbug.”
Not only does the sowbug catch a mess of fish, but it is rather easy to tie and made from materials that are generally quite inexpensive; a true win-win situation in the eyes of most fly fishers.
Materials
Hook: Daiichi 1120, sizes 10-20 (though pretty much any curved nymph hook will work fine).
Weight: .020 lead free wire.
Thread: Tan Danville 6/0 thread
Body: Tan dubbing from a hare’s mask with as many guard hairs as you can get in there.
Ribbing: Clear sewing thread (but if you don’t like to use materials from the craft store a section of 5x tippet will work just fine).
Shellback: Clear scud shellback (in this case, however, I advocate using something cheaper such as clear, synthetic Easter grass, or even a sandwich bag cut to size).
Tying Instructions:
Begin by wrapping between fifteen and twenty wraps of .020 lead free wire. For the record, I used seventeen wraps on this fly.
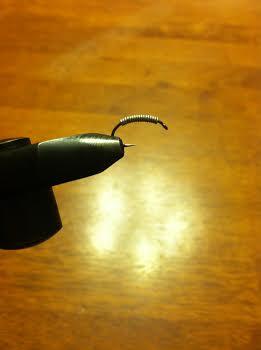 Attach your thread to the hook, wind a thread base to the back of the hook, and tie your clear sewing in at the end of the hook.
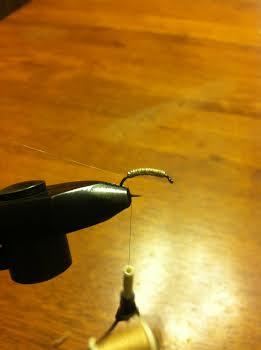 Tie your shellback material in directly over the top of the fly and wrap your thread back until it is at the rear of the fly. In this step, it is vital to ensure that your shellback material is perfectly on top of the hook, as it will later be pulled forward to create the back of your fly.
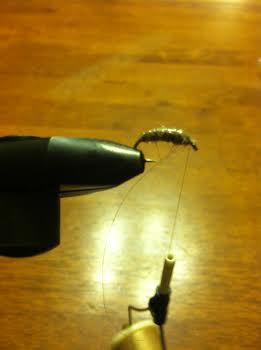
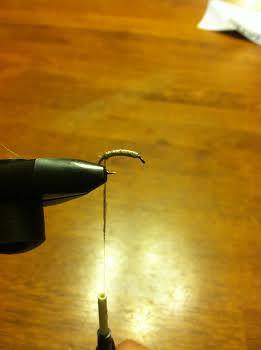 Now begin to apply dubbing to your thread and wrap forward until your fly looks something like the picture below. In this case, the buggier your fly looks the better.
 Pull your shellback material forward and tie it off behind the eye of the hook. Cut off any excess material.
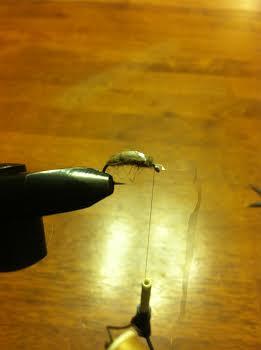 Wrap your ribbing up the fly to create a segmented look and tie it off; you can cut your excess ribbing off now. At this point, you can finish the fly off using a series of half hitches, or a whip finish. After tying the fly off I like to apply some head cement to the shellback and head, as well as pick out the dubbing to simulate legs.
The finished product:
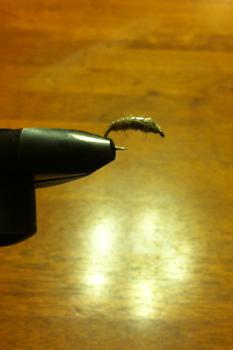
I designed this fly probably five or six years ago to match the Scuds and Sowbugs in a spring creek that was local to me at the time, and since then it has become my go-to fly for any spring creek. When fishing this fly, I tend to go without an indicator and high-stick it through any water where a trout might be found. Also, since I weight this fly fairly heavily, I tend to only use any additional weight when it is absolutely necessary. I’d suggest giving stocking your fly box with this pattern and giving it a try the next time you find yourself in a spring creek, or any other stream with a high population of Scuds and Sowbugs, and chances are you will end up nothing but satisfied.